SQL serves as a versatile language for data manipulation, dating back to 1970s. Its popularity has raised because of its declarative nature and who aren’t programmers can decipher SQL queries and grasp their functionality. As we navigate through this era, data takes center stage in organizational decision-making. The high volume of data underscores the need to make it accessible to all within an organization. But, for most organizations, the challenges are time and resource constraints. Disjointed data sources, issues with data quality, and inconsistent definitions of metrics and business attributes often result in confusion and the distribution of unreliable and inadequate information for decision-making.

This is where dbt (Data Build Tool) steps in, combining software engineering best practices with SQL data transformation. dbt offers reliability, speed, and an element of fun to the data transformation process. It allows you to modularize and centralize your analytics code, while also affording your data team the safeguards typically seen in software engineering workflows. With dbt, you can collaborate on data models, version them, test and document your queries, and then securely deploy them to production, all while maintaining monitoring and visibility. An added benefit is that dbt is an open-source tool.

dbt compiles and executes your analytics code on your chosen data platform, enabling you and your team to work on a unified source of truth for business definitions. It offers support for a wide range of databases, data warehouses, data lakes, or query engines (such as Databricks, Snowflake, and BigQuery), and it connects to data platforms through dedicated adapter plugins.
For these reasons, this post delves into the world of dbt, with PostgreSQL serving as the chosen data platform.
Prerequisites
Before exploring dbt, it’s essential to have PostgreSQL installed. Why choose PostgreSQL? Well, it’s not only user-friendly but also open-source and we’re big fans of open-source! To quickly get started, we recommend using a Docker PostgreSQL setup. You can achieve this by simply executing the following commands:
Once that’s done, you can log in to PostgreSQL and insert your password using the following command:
1
docker run --name mypostgress -e POSTGRES_PASSWORD=<YOUR-PASSWORD> -p 5432:5432 -d postgres
And then we can login in postgress running and insert your password:
1
psql -h localhost -p 5432 -U postgres
Now, Let’s proceed by creating a database and two schemas:
1
2
3
create database postgres;
create schema source;
create schema dbt;
The source schema will store the source data, while the dbt schema will be responsible for managing the staged data.
Lastly, we’ll create two tables and populate them with sample data.
1
2
3
4
5
6
7
8
9
10
11
12
13
14
15
16
17
18
19
20
21
22
23
24
25
26
27
28
29
30
31
32
33
34
35
36
37
38
39
40
41
42
43
44
45
46
47
48
49
50
51
52
53
54
55
56
57
58
59
60
61
62
63
64
65
66
67
68
69
70
71
72
73

-- Create a table to store user information

CREATE TABLE source.users (
    user_id SERIAL PRIMARY KEY,
    username VARCHAR(255) NOT NULL,
    first_name VARCHAR(255),
    last_name VARCHAR(255),
    email VARCHAR(255) UNIQUE NOT NULL,
    date_of_birth DATE,
    registration_date TIMESTAMP DEFAULT NOW()
);

-- Create a table to store product purchase data

CREATE TABLE source.product_purchases (
    purchase_id SERIAL PRIMARY KEY,
    user_id INT REFERENCES source.users(user_id),
    product_name VARCHAR(255) NOT NULL,
    purchase_date TIMESTAMP DEFAULT NOW(),
    price DECIMAL(10, 2) NOT NULL,
    product_type VARCHAR(255)
);

-- Insert data for users
INSERT INTO source.users (username, first_name, last_name, email, date_of_birth)
VALUES
    ('johndoe', 'John', 'Doe', 'john.doe@email.com', '1990-05-15'),
    ('janesmith', 'Jane', 'Smith', 'jane.smith@email.com', '1988-03-22'),
    ('alicej', 'Alice', 'Johnson', 'alice.j@email.com', '1995-09-10'),
    ('bobwilson', 'Bob', 'Wilson', 'bob.w@email.com', '1983-12-05'),
    ('evabrown', 'Eva', 'Brown', 'eva.b@email.com', '1992-07-30');
-- Insert data for product purchases
-- Note: Adjust the user_id values to match your user data

-- Electronics Purchases
INSERT INTO source.product_purchases (user_id, product_name, purchase_date, price, product_type)
VALUES
    (1, 'Smartphone X', '2023-10-05 10:30:00', 799.99, 'Electronics'),
    (1, 'Laptop Pro', '2023-10-05 11:15:00', 1299.99, 'Electronics'),
    (2, 'Tablet S', '2023-10-05 14:45:00', 349.95, 'Electronics'),
    (2, 'Headphones A', '2023-10-05 15:30:00', 99.99, 'Electronics'),
    (3, 'Camera B', '2023-10-06 09:20:00', 599.50, 'Electronics'),
    (3, 'Smartwatch Z', '2023-10-06 10:10:00', 249.75, 'Electronics'),
    (4, 'TV Ultra', '2023-10-06 13:45:00', 899.99, 'Electronics'),
    (4, 'Gaming Console C', '2023-10-06 15:00:00', 299.95, 'Electronics'),
    (4, 'External Hard Drive', '2023-10-07 10:00:00', 89.99, 'Electronics'),
    (5, 'Fitness Tracker Y', '2023-10-07 11:30:00', 79.95, 'Electronics');

-- Home Appliances Purchases
INSERT INTO source.product_purchases (user_id, product_name, purchase_date, price, product_type)
VALUES
    (5, 'Vacuum Cleaner', '2023-10-07 14:15:00', 149.99, 'Home Appliances'),
    (5, 'Kitchen Mixer', '2023-10-08 09:45:00', 119.95, 'Home Appliances'),
    (5, 'Toaster', '2023-10-08 10:30:00', 29.50, 'Home Appliances');

-- Clothing Purchases
INSERT INTO source.product_purchases (user_id, product_name, purchase_date, price, product_type)
VALUES
    (1, 'T-shirt', '2023-10-09 14:30:00', 19.99, 'Clothing'),
    (2, 'Jeans', '2023-10-10 11:00:00', 49.95, 'Clothing'),
    (3, 'Sneakers', '2023-10-10 15:15:00', 69.99, 'Clothing'),
    (4, 'Dress Shirt', '2023-10-11 09:45:00', 39.95, 'Clothing'),
    (4, 'Dress', '2023-10-11 14:00:00', 79.50, 'Clothing');

-- Books Purchases
INSERT INTO source.product_purchases (user_id, product_name, purchase_date, price, product_type)
VALUES
    (1, 'Novel A', '2023-10-12 17:30:00', 12.99, 'Books'),
    (2, 'Self-Help Book', '2023-10-13 10:45:00', 24.95, 'Books'),
    (3, 'Cookbook', '2023-10-14 12:15:00', 29.99, 'Books'),
    (4, 'Travel Guide', '2023-10-15 13:30:00', 18.95, 'Books'),
    (5, 'Science Fiction Book', '2023-10-16 16:00:00', 15.50, 'Books');
DBT
Now that we have our postgresql and some data let’s try using dbt. But first let’s install dbt for postgres:
With PostgreSQL up and running and some initial data in place, it’s time to explore using dbt. However, before we dive into dbt, let’s begin by installing dbt for PostgreSQL:
1
pip install dbt-postgres
And there you have it! It’s incredibly easy, isn’t it?
Init
First, let’s kickstart your dbt project with the following command:
1
dbt init <NAME-OF-YOUR-PROJECT>
Once you run this command, a folder with the name of your project will be generated, containing several subfolders. Let’s navigate into this newly created directory.
Next, we need to establish the configuration for connecting to your PostgreSQL database. To set up the PostgreSQL connection, you should define the configuration in your ~/profiles.yml file with a structure like this:
1
2
3
4
5
6
7
8
9
10
11
12
13
14
15
16
17
18
19
20
21
company-name:
  target: dev
  outputs:
    dev:
      type: postgres
      host: [hostname]
      user: [username]
      password: [password]
      port: [port]
      dbname: [database name] # or database instead of dbname
      schema: [dbt schema]
      threads: [optional, 1 or more]
      keepalives_idle: 0 # default 0, indicating the system default. See below
      connect_timeout: 10 # default 10 seconds
      retries: 1  # default 1 retry on error/timeout when opening connections
      search_path: [optional, override the default postgres search_path]
      role: [optional, set the role dbt assumes when executing queries]
      sslmode: [optional, set the sslmode used to connect to the database]
      sslcert: [optional, set the sslcert to control the certifcate file location]
      sslkey: [optional, set the sslkey to control the location of the private key]
      sslrootcert: [optional, set the sslrootcert config value to a new file path in order to customize the file location that contain root certificates]
In our example, the profiles.yml is configured as follows:
1
2
3
4
5
6
7
8
9
10
11
12
13
14
users:
  outputs:

    dev:
      type: postgres
      threads: 1
      host: localhost
      port: 5432
      user: postgres
      pass: <MY-PASSWORD>
      dbname: postgres
      schema: dbt

  target: dev
To verify that the configuration is functioning correctly, you can execute the following command within your dbt project:
1
dbt debug
If everything is set up properly, no errors should be displayed.
First Model
With dbt, you can bid farewell to the error-prone practice of manually copying and pasting SQL code whenever your logic evolves. Instead, with dbt you can construct reusable data models that can be incorporated into subsequent models and analyses. Updating a model will automatically propagate the change to all its dependent components.
But what precisely are dbt models? These models provide dbt with the instructions on how to generate specific datasets. A model is a single file that contains SQL SELECT statement. A dbt project can consist of multiple models, and these models can reference one another. When combined with the management of numerous projects, dbt significantly streamlines the process of transforming complex datasets, far surpassing traditional methods.
Now, let’s connect our source table to our models by creating a schema.yaml file within the models folder.
1
2
3
4
5
6
7
8
9
10
11
version: 2

sources:
  - name: user_product
    schema: source
    description: "A sample model of user and products."
    tables:
      - name: users
        description: "User table"
      - name: product_purchases
        description: "Purchases of users"
Now, let’s craft our initial model using an SQL file,
models/user_products_model.sql:
1
2
3
4
5
6
7
8
9
10
11
12
13
14
15
16
17
18
19
20
21
22
23
24
25
with users_info as (
    SELECT user_id, username,
            EXTRACT(YEAR FROM date_of_birth) AS extracted_year
    FROM { { source('user_product','users')  } }
),
product_purchases_info as (
    SELECT *
    FROM { { source('user_product','product_purchases') } }
),
user_purchases as (
    SELECT product_name,
            purchase_date,
            price,product_type,
            username,
            extracted_year
    FROM users_info as u
        INNER JOIN product_purchases_info as p
        on u.user_id = p.user_id

),
final as (
    SELECT * FROM user_purchases
)

SELECT * from final
In this SQL file, you’ll notice the use of the dbt function source, which serves as a placeholder. During compilation, this function will be replaced with the appropriate details of the tables defined in the schema.yaml file, allowing seamless integration of the source data into your models.
Now, you can execute your project using the following command:
1
dbt run
Following this, dbt will autonomously generate views in your database, named with your dbt models.
Do you prefer to create tables instead of views? You can do so by adding the following line at the beginning of the model file: {{ config(materialized=’table’) }}
Subsequently, you can access your PostgreSQL database and inspect your model by executing:
1
SELECT * FROM dbt.users_products_model;
You can also establish references to other models within your dbt project. For example, let’s create a second model:
models/product_type_model.sql
1
2
3
4
5
6
7
8
9
10
11
12
13
14
15
16
{ { config(materialized='table') } }

with user_purchases as (
    SELECT *
    FROM { { ref('users_products_model') } }
),
product_type_sales as (
    SELECT product_type, SUM(price) as sum_price, AVG(price) as avg_price
    FROM user_purchases
    GROUP BY product_type
),
final as (
    SELECT * FROM product_type_sales
)

SELECT * FROM final
This new model draws its source data from the first dbt model and simply calculates the sum and average of prices, grouped by the product type. This demonstrates how dbt models can be interrelated and leveraged to build complex data transformations.
Now, you might be wondering, “What if I have multiple environments like DEV, UAT, and PROD? How can I utilize my models across different environments?” The answer is straightforward; you can define multiple environments within your ~/profiles.yaml file. For example:
1
2
3
4
5
6
7
8
9
10
11
12
13
14
15
16
17
18
19
20
21
22
23
users:
  outputs:
    dev:
      type: postgres
      threads: 1
      host: localhost
      port: 5432
      user: postgres
      pass: <PASSWORD-DEV-DB>
      dbname: postgres
      schema: dbt

    prod:
      type: postgres
      threads: 1
      host: localhost
      port: 5432
      user: postgres
      pass: <PASSWORD-PROD-DB>
      dbname: postgres_prod
      schema: dbt

  target: dev
And you can then choose to run your dbt project on a specific environment by using the following command:
1
dbt run --target prod
Test
With dbt, you can take advantage of model testing to enhance the integrity of your SQL code. When you run dbt test, the tool will evaluate whether each test in your project passes or fails. These tests are instrumental in ensuring the quality of your data transformations.
Out of the box, dbt enables you to run tests to verify whether a specified column in a model adheres to specific criteria. This includes checks for non-null values, uniqueness, matching values in other models (e.g., confirming that a customer_id for an order corresponds to an id in the customers model), and the presence of values from a predefined list.
Moreover, you can define generic tests by creating files in the macros folder. For instance, if you want to create a test ensuring that all values in a column are not less than or equal to zero and not null, you can create a file like this:
macros/not_null_greater_zero.sql
1
2
3
4
5
6
7
8
9
10
11
12
13
14
15
16
17
18
19
20
21
22
23
24
25
26
{ % test is_not_null_g_0(model, column_name) % }

with validation as (

    select
         as field

    from

),

validation_errors as (

    select
        field

    from validation
    -- if condition for finding errors
    where field <= 0 OR field IS NULL

)

select *
from validation_errors

{ % endtest % }
This test template accepts two arguments: model and column_name, which are dynamically inserted into the query. This flexibility allows you to apply the test to various columns and models by specifying the appropriate values for model and column_name.
To apply this test to a specific model, you need to update the schema.yaml file in the models folder. Here’s an example:
1
2
3
4
5
6
7
8
9
10
11
12
13
14
15
16
17
18
19
20
21
22
23
24
25
26
version: 2

sources:
  - name: user_product
    schema: source
    description: "A sample model of user and products."
    tables:
      - name: users
        description: "User table"
      - name: product_purchases
        description: "Purchases of users"

models:
  - name: products_type_model
    description: "For each type of the products price aggregations"
    columns:
      - name: product_type
        description: "Type of the product"
      - name: sum_price
        description: "Sum of the prices"
        tests:
          - is_not_null_g_0
      - name: avg_price
        description: "Avg of the prices"
        tests:
          - is_not_null_g_0
In this example, we’ve added a models definition with descriptions, and we’ve applied the is_not_null_g_0 test to the sum_price and avg_price columns. This allows you to ensure the quality and consistency of your data across your dbt models.
To run the test:
1
dbt test
Macros and Jinja
In dbt, you can seamlessly integrate SQL with Jinja, a templating language, which transforms your dbt project into a dynamic programming environment for SQL. This opens up possibilities that aren’t typically available in standard SQL. With Jinja, you can incorporate control structures, such as if statements and for loops, directly into your SQL code. You can also utilize environment variables in your dbt project, particularly valuable for production deployments and other advanced use cases.
We’ve already encountered Jinja in action when defining a test, essentially creating a Jinja-powered macro.
For instance, if you want to create a function that replaces spaces with a specified value, you can create a new file within the macros folder, like this:
macros/replace_space.sql
1
2
3
{ % macro replace_space(column_name, value='_') % }
    REPLACE( { {column_name} }, ' ', '') as
{ % endmacro % }
Now, you can incorporate this macro into your models. For instance, within your products_type_model:
1
2
3
4
5
6
7
...
product_type_sales as (
    SELECT { { replace_space('product_type') } } as product_type, SUM(price) as sum_price, AVG(price) as avg_price
    FROM user_purchases
    GROUP BY product_type
)
...
By doing so, you eliminate the undesirable practice of manually copying and pasting SQL code within your statements and centralize all the recurring SQL constructs in one location.
Let’s take on a more complex example now. Imagine our exceptionally meticulous business requires a table that, for each column, presents all product types with the sum of prices for each product. Here’s an example of what we’re aiming for:
1
2
3
4

 home_appliances_amount | electronics_amount | clothing_amount | books_amount | count
------------------------+--------------------+-----------------+--------------+-------
                 299.44 |            5569.04 |          259.38 |       102.38 |     4
To achieve this, we’ll harness the power of dbt macros and Jinja by creating a new fresh dbt model:
models/product_type_complex_model.sql
1
2
3
4
5
6
7
8
9
10
11
12
13
14
15
16
17
18
19
20
21
22
23
24
25
26
27
28
29
30
{ { config(materialized='view') } }

{ % set product_type_query % }
SELECT { { replace_space('product_type') } }
FROM dbt.products_type_model
{ % endset % }

{ % set result = run_query(product_type_query) % }

{ % if execute  % }
    { % set result_list = result.columns.product_type.values() % }
{ % endif % }

with product_type_table as (
    SELECT { { replace_space('product_type') } }, sum_price
    FROM { { ref('products_type_model') } }
),
product_type_sales as (
    SELECT
        { % for t in  result_list % }
            sum(case when product_type = '' then sum_price end) as _amount,
        { % endfor % }
        COUNT(*) as count
    FROM product_type_table
),
final as (
    SELECT * FROM product_type_sales
)

SELECT * FROM final
In this model, we define a query to be executed, product_type_query, using our replace_space macro to handle spaces in the product type names. We store the results in result_list, which lists all product types. For each product type in result_list, we calculate the sum of prices. This approach allows us to dynamically generate the desired table with sums for each product type, eliminating the need for manual data entry and making use of the power of dbt macros and Jinja templating.
Documentation
Let’s face it, documentation might not be the most thrilling aspect of your work. When you’re busy crafting SQL statements, it’s easy to skimp on those few lines of comments, isn’t it?

But here’s the reality check - avoiding documentation in a complex project can make understanding data models a challenging and horrible experience.
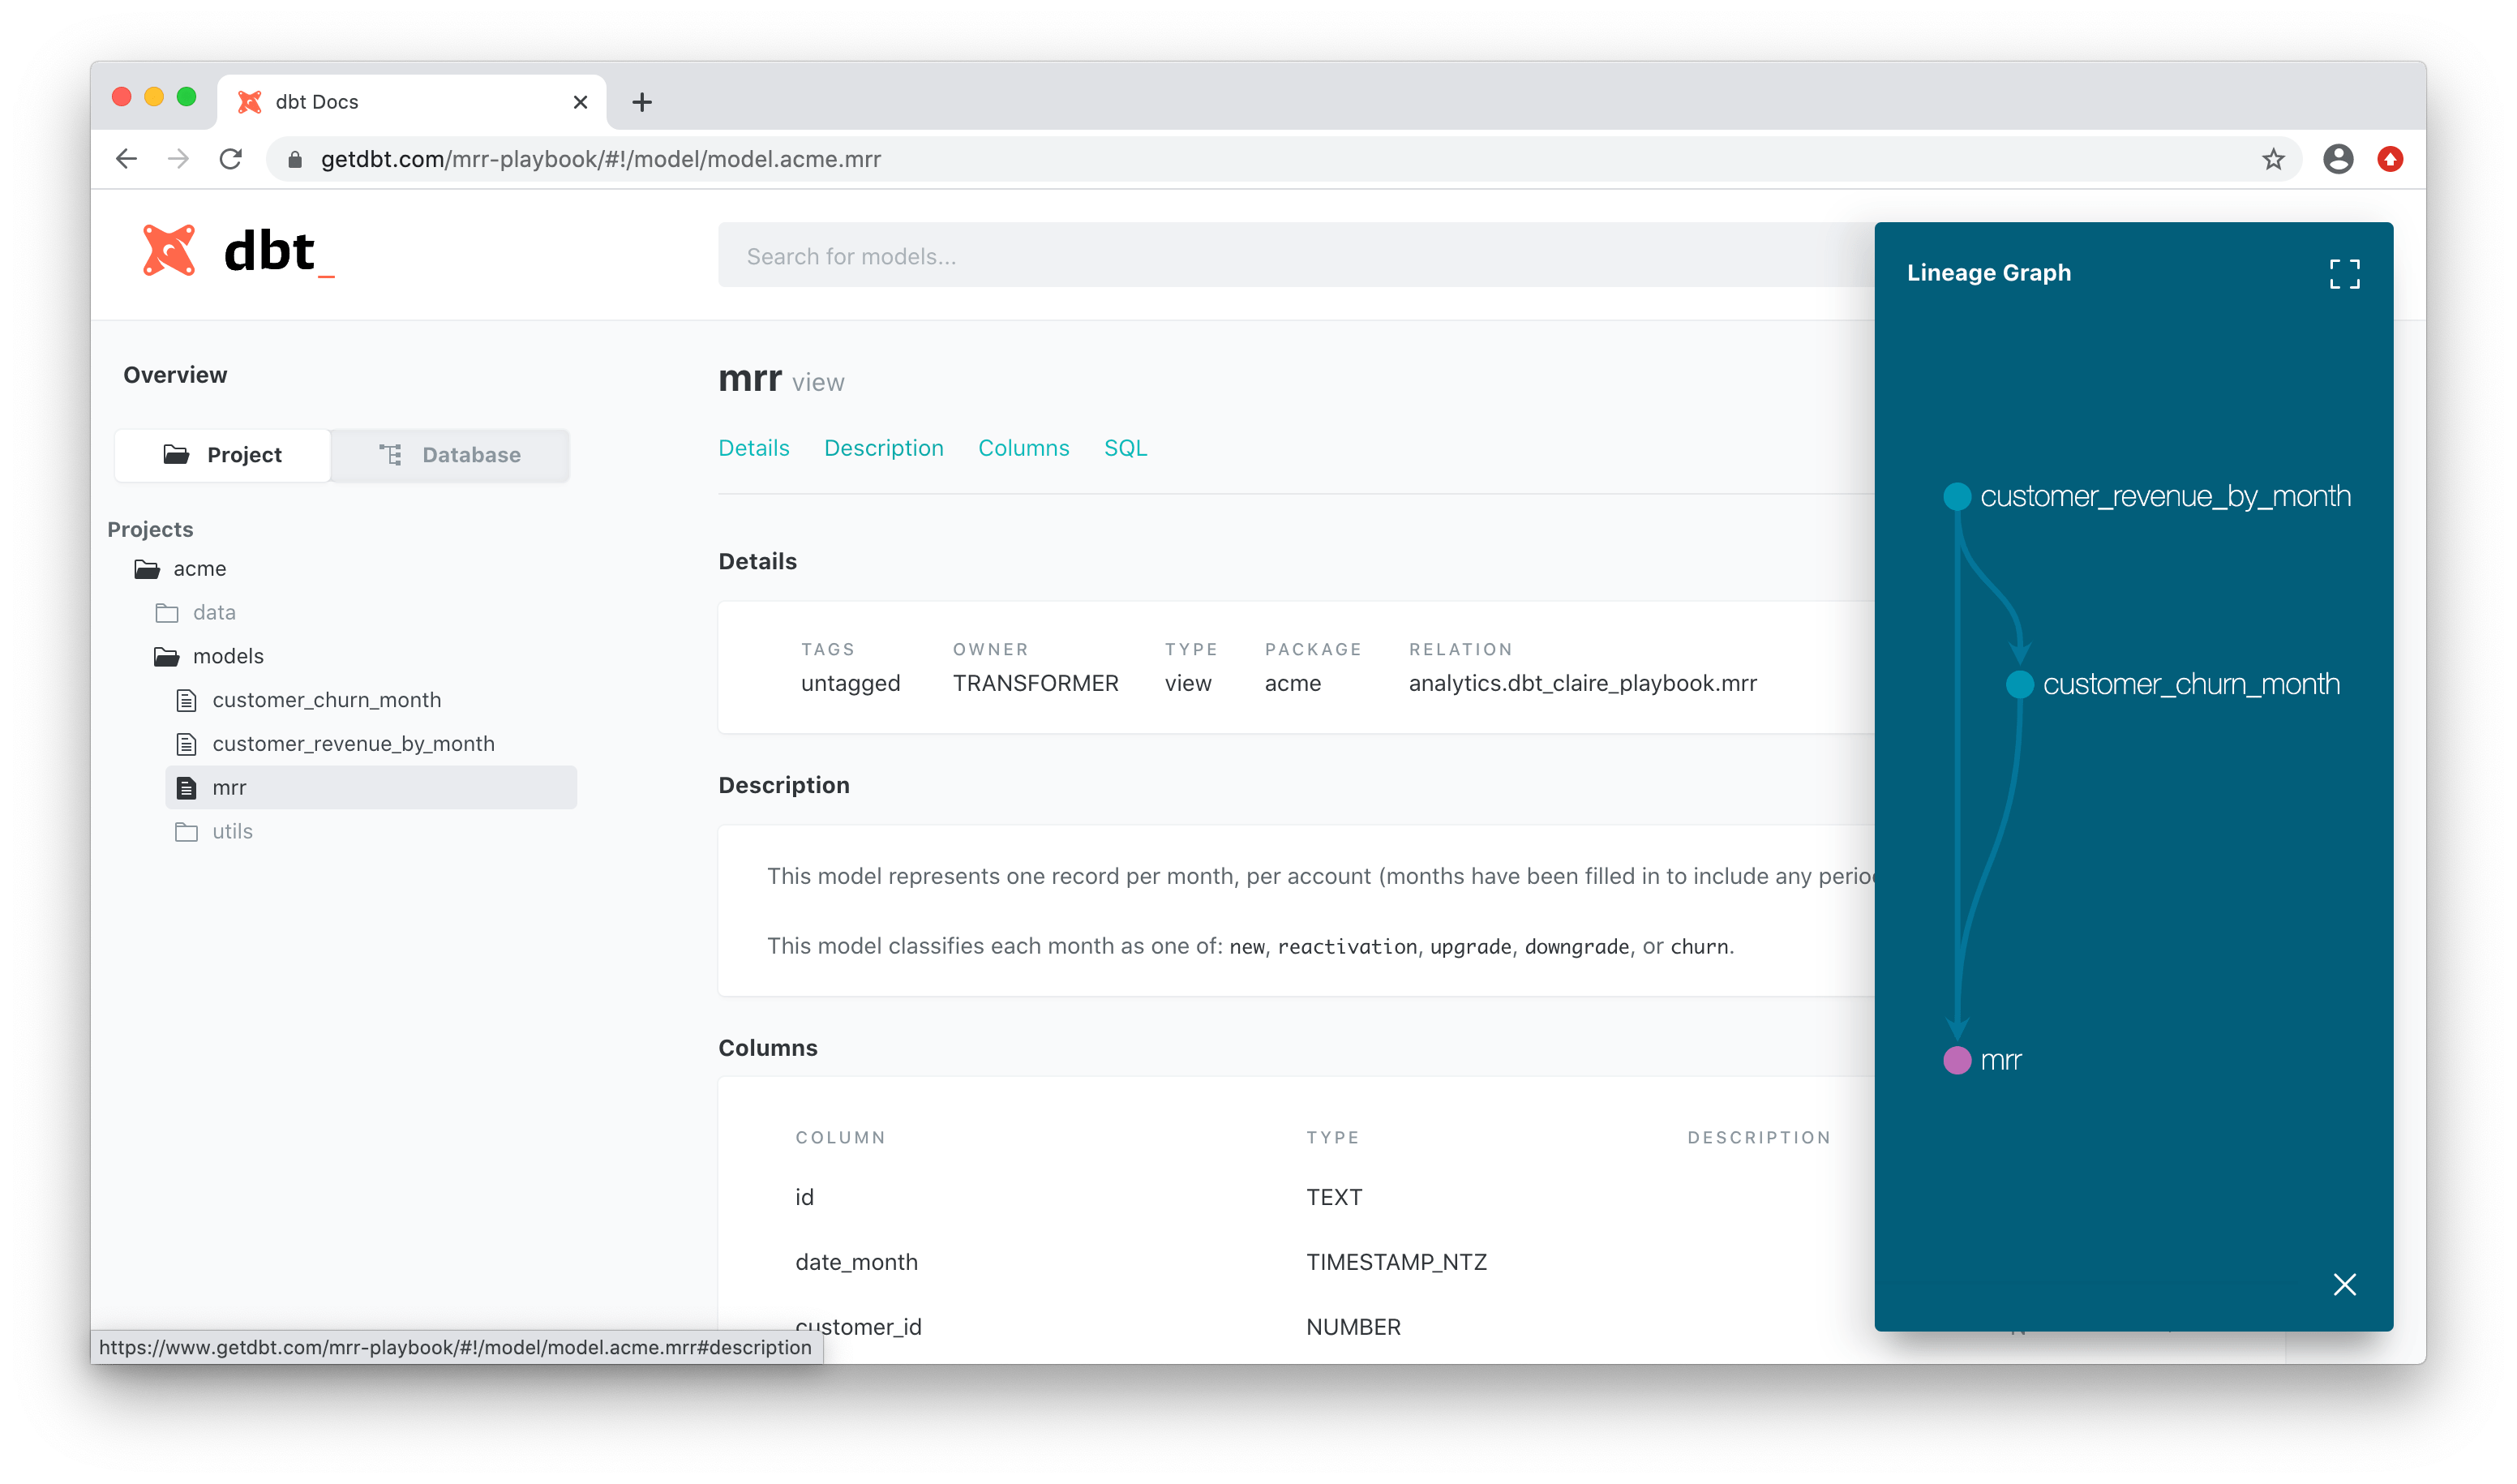
Luckily, dbt steps in to rescue you from this documentation abyss. It offers a way to effortlessly generate project documentation and present it as a user-friendly website. This documentation contains essential information about your project, including model code, a visualization of your project’s dependencies (DAG), any column-level tests you’ve incorporated, and much more.
What’s more, dbt lets you add descriptions to models, columns, sources, and other components, enriching your documentation further and making it an indispensable resource.
To experience it in action, you can create a documentation website using the dbt docs generate and dbt docs serve commands. This user-friendly documentation portal will become your best friend in navigating and understanding your data project.

Reference link
For more details check out these links: